Showing posts with label Pink Paislee. Show all posts

Tuesday, November 7, 2017

Citrus Twist November Stories kit

Oh my gracious I love this kit! It's gorgeous, and the exclusive paper this month seems like it was made just for me! If you have followed me for a while, you know just how much I love floral papers, and this paper is no exception. 

I've had this photo in a pile to be scrapped for years...yes, years! I was waiting for inspiration, and this kit certainly inspired me to get it documented. I chose cut file by Paige Evans that is available in the Silhouette design store. 


The orange floral paper is the first one that I chose to back the cut file with and since I love it so much it had to go in the center of the pumpkin. The aqua triangle paper and the yellow and white diagonal striped paper are perfect choices to place beside the floral since both colors are found in the floral. To finish off the ends of the pumpkin, I backed the file with the soft coral-red paper which pulls out colors in the photo.


 This cut file begged me to stitch around it...yes it truly begged :)  I used all six strands of embroidery floss and did a simple backstitch all around the pumpkin. I'm in love with the way that it turned out.


This photo makes me laugh because it is near impossible to get two toddlers to look at the camera at the same time, much less smile. The main kit has a lot of die cuts included and this circle one that says "not happening" needed to be on this page. 


I've included a link to my process video if you'd like to take a peek at how the page came together. Thanks for stopping by and I hope you have a great day!


Saturday, October 28, 2017

My First Traveler's Notebook Spread...

Yes, I swore to myself that I did not need to get on the Traveler's Notebook train....but I did it anyway and am so glad that I took the plunge! Creating the spread was definitely a challenge due to the smaller surface area, but I love the end result and will be creating more pages in the near future.

This spread was created after the Las Vegas massacre. My heart was broken for all of the families and I needed to get something down on paper. Since the world is in need of more love, I chose that as my title. 

In creating this spread I used the gorgeous October Citrus Twist kits. Unfortunately the kit is now sold out but you can sign up to begin a subscription with November's kit.


The exclusive stamp Life is Good is still available in the shop as of this moment. One of my favorite phrases on the stamp is "yes. this.", and it was perfect for this spread. I stamped it several times on the labels and love the way that it turned out.


As a Christian I look for comfort in the Bible. There is always a verse that speaks to my heart and gives me comfort, and I wanted to include it on this spread. I'm thinking that this insert of my TN will be dedicated to Bible verses, devotions, or other forms of worship. 


I don't play with SnapChat often, but the heart filter was perfect for the selfie that I sent to my husband to let him know how much I missed him when he was out of town. It became the perfect photo for this spread. Paige included some really great phrases in her new collection, and this die cut spoke to me...it is what I have to believe. Good things are coming.


Here's a link to my process video if you'd like to take a closer peek. Thanks so much for joining me today and I hope that you have a wonderful day!


Tuesday, August 15, 2017

It's Time for Another Sketch!

Today I am sharing a fabulous sketch that Laura created for Stuck?! Sketches


 As soon as I saw it I knew exactly which paper I wanted to use to fussy cut the flowers. This has been done before, but I still wanted to do it and I love the end result!


Fussy cutting these flowers and then stitching them did take me several hours, but I love doing it so I don't mind it at all. My wrist did hurt a bit afterwards...this is the biggest hand stitching project I've done since spraining it, but the pain was oh so worth it :)


Everything is from Paige Evan's "Oh My Heart" collection with the exception of the enamel dots, the butterflies, and the chipboard "Hello". 


To make sure that the journaling was legible, I adhered the strips close together. Another option was to paint white acrylic paint or gesso over the area, but I wasn't in the mood to get my hands dirty and this worked just fine.


We'd love for you to play along with this sketch. If you do, please be sure and link your project up to the site. You'll have a chance to win a prize from one of these two sponsors this month.


Here's a link to my process video if you'd like to take a peek at how the page came together. Thanks so much and have a great day!


Thursday, June 1, 2017

June 1st Reveal

My goodness it is hard to believe that it is June 1st! This year is flying by so quickly. Today I will be sharing another fabulous sketch that Laura created over at Stuck?! Sketches. The sketch calls for three photos, but can easily be adapted. I chose one 4x6 photo, and then used a frame to house my embellishment cluster.


I've been wanting to use Paige Evan's new collection since there are several book elements in the die cuts and chipboard. I'm a big reader and luckily both kids love to read as well. My daughter went through a phase where she read every single fairy book that she could get her hands on, and to this day we still have them. I just can't bear to part with them just yet.


Everything is from Paige Evan's new line Oh My Heart with the exception of the pink glitter alphas (old Dear Lizzy Thickers), the green tile stickers (Webster's Pages), and the enamel dots. The doilies are Cambridge lace doilies and they can be found on Amazon and eBay.


 It took me quite a long time to fussy cut these flowers. My wrist is healing but there are certain things that tend to aggravate it and fussy cutting is one of them. I really wanted to add some stitching to the flowers but I knew that when I created this layout that I would not be able to do so and finish it it time. I *might* go back and add the stitching once my wrist is healed.


We would love for you to play along with us this month! Be sure and link your layout up to the blog and you'll have a chance at winning a prize from one of out sponsors.


I'm a bit behind this week...I will update the blog once I upload my process video :)


Monday, May 1, 2017

May 1st Reveal

Today is reveal day for Stuck?! Sketches and it is another great sketch! This sketch calls for three small photos, but can easily be adapted to one or two photos as well. 

 I chose these two photos of my son on his first "official" college visit. I did move the title down below the photos for a couple of reasons. First, the font that I used is rather large and the title is a bit too long to fit on top of the photo cluster. Also, I journaled and tied it into the title. The title stands on its own, but once you read the journaling it all comes together. 


This Pink Paislee collection Fancy Free is quite possibly one of my all time favorite collections for masculine layouts. I have used it for several layouts and am getting sad that I'm down to scraps with certain papers. 


 The yellow alphas are by Studio Calico, the gray Thickers are Amy Tangerine, and the phrase chipboard stickers, and green triangle enamel shape are by Freckled Fawn.


I love to use arrows although I'll admit they can be a bit of a struggle. This arrow from the PP chipboard sheet was perfect to use to point to the Visitor's Guide. I love it when things come together like this!


Please be sure to stop by the blog and see what the Design Team has created with this sketch! We'd love for you to play along. Be sure and link your layout for a chance to win a prize from our sponsors this month.


I have a process video for this layout as well if you'd like to take a closer peek at my process.


Saturday, January 7, 2017

Cocoa Daisy

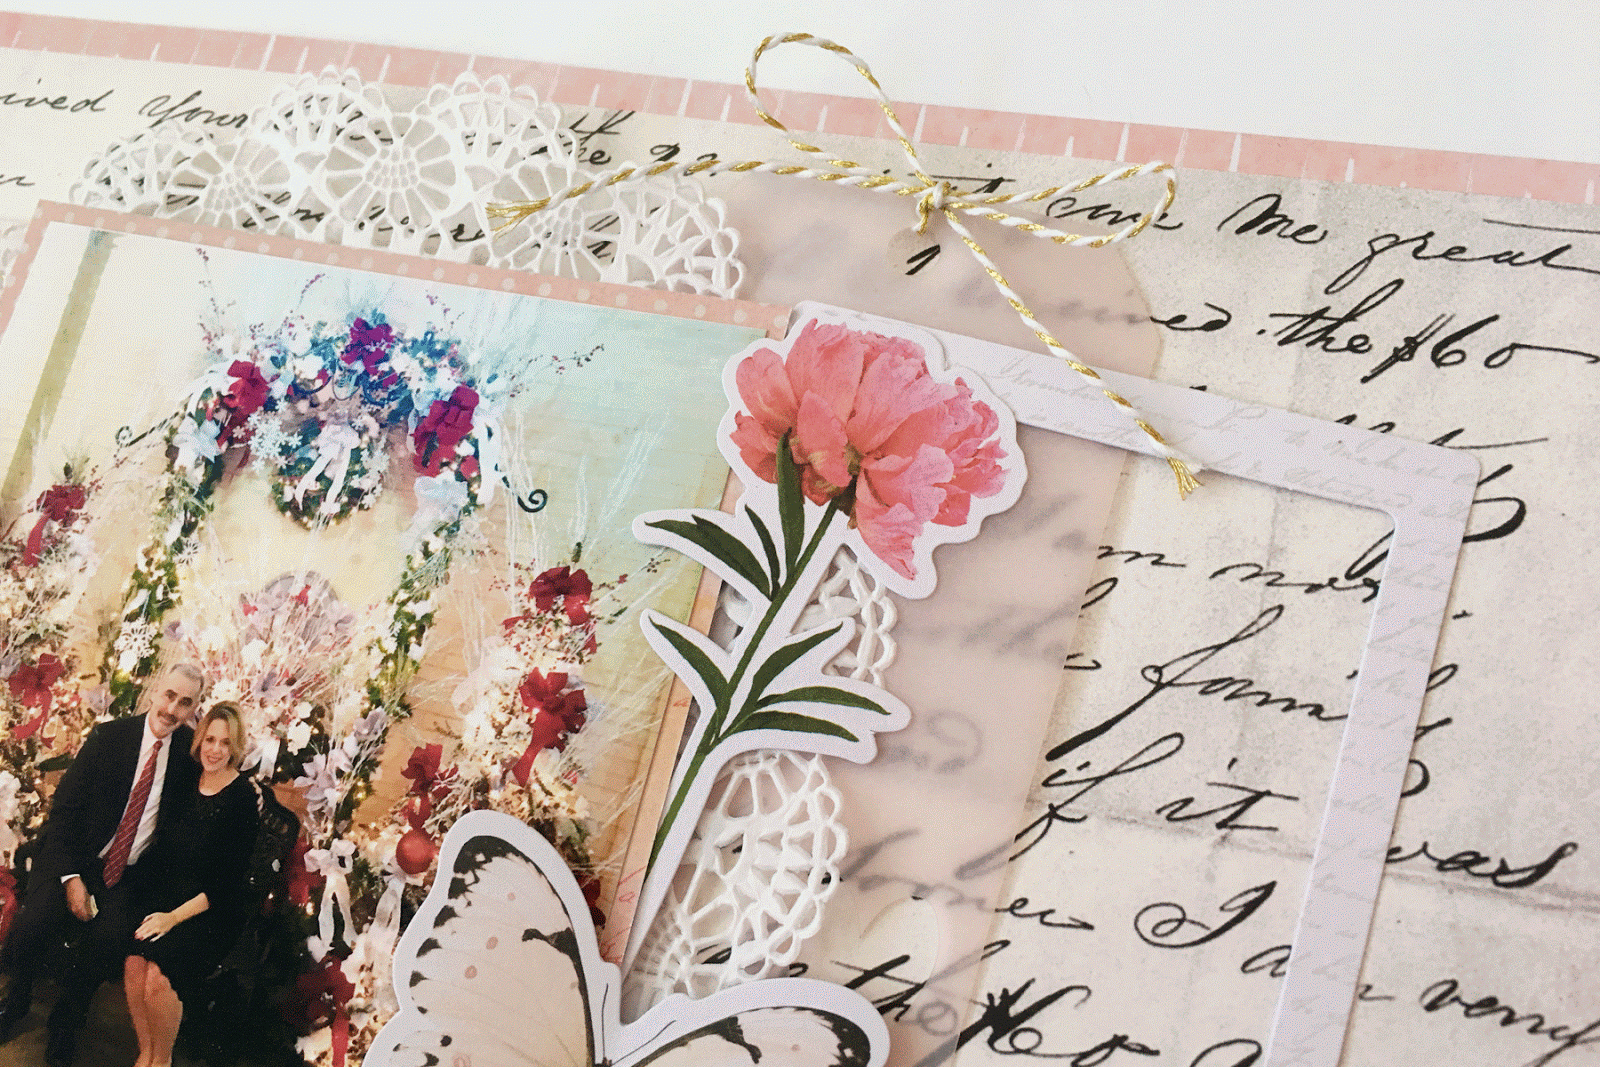
Today I have my first layout using the Cocoa Daisy January kit Buttercup. It is absolutely stunning and primarily comprised of Pink Paislee's Moonstruck collection along with some exclusive CD products. The theme is a romantic one and I knew right away that I had the perfect photo to scrap with this kit.

My husband and I went on a date to a historic hotel and they had this beautiful bench surrounded by flowers. While the photo may not be the best quality, it is still one that I wanted to document since it was our first Christmas visit. We hope to make this a new tradition for us every Christmas.


The gold butterfly is gorgeous and unfortunately the photo just does not do it justice. I wish that the die cut package had more than one because it is that pretty!


The pink vellum tag is an exclusive to the kit this month. I tucked it behind the photo and the frame and love the subtle visual interest it gives to that cluster. Leaving a tag plain without ribbon or twine just seems wrong to me. It is such an easy way to add another texture to the page without bulking up the layout. Gold twine seemed to be the perfect choice and this was from my stash.


 The kit came with several alphas that are beautiful, but I really wanted the title to be a bit more subtle. I used the alphas that came in January's kit since they worked well with the hints of gold throughout the page. I also stamped the two small hearts in the bottom cluster with gold ink. Again, I love it when I can add small details to my page.


I have a process video if you'd like to take a peek. Thanks so much and I hope that you have a great day!


Monday, October 24, 2016

Counterfeit Kit Club Blog Hop

Today I am participating in the Counterfeit Kit Blog Hop, and this will be my last post for them this month as their October Guest Designer. I've included the full list of participants and their links so you can easily hop along and join in on the fun.

http://www.counterfeitkitchallenge.blogspot.com
http://kaybeetoo.blogspot.com (This is where you are now)


Today's layout that I am sharing was created for the third challenge that was titled Playing Dress Up. This challenge involves doing anything to dress up your layout. You can choose to disguise it by adding paint or mixed media work, or bling it up by added stitching and sequins. I chose to use distress inks and mist to dress up the background along with adding gold foiled diecuts and glitter Thickers.


In my stash kit I had a few scraps of the gold polka dot vellum so I took a small piece and layered it with the paper layers behind the photo for some extra bling.


The floral diecuts were on my list to use with this kit. They are just so pretty and I was pleased that I was able to work them onto this page. Using my pretty things on a layout is so much better than hoarding them :)


The gold glitter Thickers were my starting point for this challenge. I love the font and the glitter, and knew that I had this photo of me and my husband that would be perfect for this page. Sometimes the photos influence the products I use, and sometimes the products dictate the photos I choose to scrap. I scrap both ways and love them both.


I have truly enjoyed playing along with the Counterfeit Kit Club this month. It has been a great way to dig into my stash and use some older products. I have a process video for this layout as well if you'd like to take a peek. Thanks so much for joining me and I hope you have a great day!


Friday, October 14, 2016

Love This

I created this layout a few months ago, and just have not had time to do a voiceover for the process video so that I could share it. I need more hours in the day...or an assistant...or both :)

I love the Fancy Free collection by Paige Evans. The colors and patterns are beautiful!! I think that my favorite thing about the collection is that I can use it for both masculine and feminine pages. Although I don't mind using pink for boy pages, it is nice to have a non-themed collection that is not primary colors. The cut file is designed by Ashley Horton and is available online at The Cut Shoppe


It is easy to get in a rut when it comes to designing pages, at least it is for me. So for this page, instead of overlapping the title on the bottom of the photo, I chose to put it along the side. It felt so good to do something a bit different, plus from a design perspective it works well with the vertical design of the hearts.

 Silver stitching down the center of the hearts helps to add to the vertical design of the page, plus it ties in the title. I also added some stitching along the strips on the left side of the layout. I will say this about the silver metallic thread...I thought I was going to throw my sewing machine out of the window. This thread broke so many times and also jammed up in the machine. Ugh!! However, I am not a sewing machine expert so I am sure that it was user error. 


For an unexpected pop of color, I brought in the salmon pink button and puffy stickers. Enamel dots finished off the clusters. I have a process video if you'd like to take a peek at my process. I hope that you have a great day, and I'll be back soon with another layout :)


Monday, October 10, 2016

Scrap the Challenge: Focus on Fall

Mari and I decided to focus on fall for this week's challenge. Fall is one of my favorite seasons for so many reasons, so I thought that it would be neat to document it. I used this shape from the Silhouette design store by Felicity Jane. I bought it when the silhouette store was having a sale because I knew that I would most certainly use it. I also pulled out my kit that I made for the Counterfeit kit challenge for this month. 


 I am really trying to make an effort to use more patterned paper as backgrounds, and I love the way the cut file looks on this paper. The pink just makes everything pop off the page and I couldn't be more thrilled with the way that it turned out.


 Instead of journaling in sentence form, I typed out several things that I love about fall and then placed them randomly on the die cut. I then sewed through the strips with gold thread to add a bit more gold to the layout. Adding more gold is always a good thing!


These Dear Lizzy Thickers are some of my favorites for their size. The height adds impact and the width allows for a longer title without taking up a lot of room on the page. 


The papers used on this layout, the leaf clip, and the die cut pieces are all from the Pink Paislee Cedar Lane collection. I'm not 100% sure where the fox flair is from, but I think it is Freckled Fawn. I'm linking the process video below in case you'd like to take a peek at how the layout came together. Be sure and check out Mari's video as well. As always, suggestions for future challenges are always welcome :)


Thursday, October 6, 2016

Counterfeit Kit Challenge #1: Snip, Snip

Today's layout with the Counterfeit Kit challenge is one that I love and I had the perfect paper in my stash kit. One of my favorite things is to fussy cut shapes and flowers out of patterned paper and use them as embellishments. It is such a great way to stretch a kit or collection, especially if you are low on coordinating embellishments. 

While it may seem a bit strange to document a cooked turkey, cooking it was a really big deal. My mother is not a good cook. She grew up in the country with fresh eggs and plenty of vegetables, and not a lot of meat. So growing up, whenever I ate chicken or turkey and it was dry, I thought that was how it was supposed to taste. Boy was I wrong, and I am so glad that a friend talked me into taking over the Thanksgiving meal. Here is the recipe in case you want to give it a try, and I will also say that using a fresh and not frozen turkey makes it out of this world. 


The leaf paper clips are one of my favorite embellishments in the kit, so I was super happy that I could include one on this photo. I surprised myself by matting the photo with pink patterned paper, but I found that it really complemented the pink leaves of the flowers and the photo itself.


Last year I found these gold leaves in the Target dollar spot and did not use a single one. They make the perfect addition to this cluster and help to tie in the gold Thickers as well.


My journaling is pretty straightforward, and I may make another page with the actual recipe. I haven't decided though, because I may end up creating a layout on my entire dinner with the recipes used. Decisions, decisions...


My process video is linked below. I encourage you to visit Counterfeit Kit Challenge blog and see how other DT members tackled this challenge. Have a wonderful day!


Saturday, October 1, 2016

October Guest Designer for Counterfeit Kit Challenge

This month I am the guest designer for Counterfeit Kit Challenge! Our inspiration is the beautiful new collection Indigo Hills from PinkFresh Studios. If you haven't ever played along with this group, the idea is to pull together a kit from your stash using a kit or collection as the inspiration piece. I chose the pretty blue color in the alphas as my inspiration, however I didn't have anything quite the same shade. So I decided to still use the color blue, just a different hue. Since it is fall and I am ready for cooler weather, I pulled out what I have of Pink Paislee's Cedar Lane collection as the starting point of my kit.


Several of my embellishments were open making it difficult to take good pictures of them, so I am going to list what I included in the kit:
Pink Paislee Cedar Lane 6x6 and 12x12 papers
Pink Paislee Cedar Lane leaf clips
Pink Paislee Cedar Lane ephemera
Pink Paislee Cedar Lane puffy stickers
Pink Paislee Cedar Lane arrows
Pink Paislee Cedar Lane washi tape booklet
Pink Paislee Cedar Lane fabric tags
Jen Hadfield DIY Home stickers
Jen Hadfield DIY Home die cuts
Jen Hadfield DIY Home washi strip booklet
Simple Stories wood veneer
Miscellaneous flair, sequins, and paper clips
Recollections puffy stickers
Studio Calico tile alphas 
tags 
doilies
enamel dots

Here are the Design Team members in case you would like to see what they have chosen for their kits this month. I hope that you play along this month and make your own counterfeit kit!

Lesley:  Oh! Blog It!